Superheat and Subcooling Explained: The Two Measurements Every F-Gas Engineer Must Master
Learn how to measure and interpret superheat and subcooling, what typical target values mean, and how both readings help you diagnose refrigeration faults.
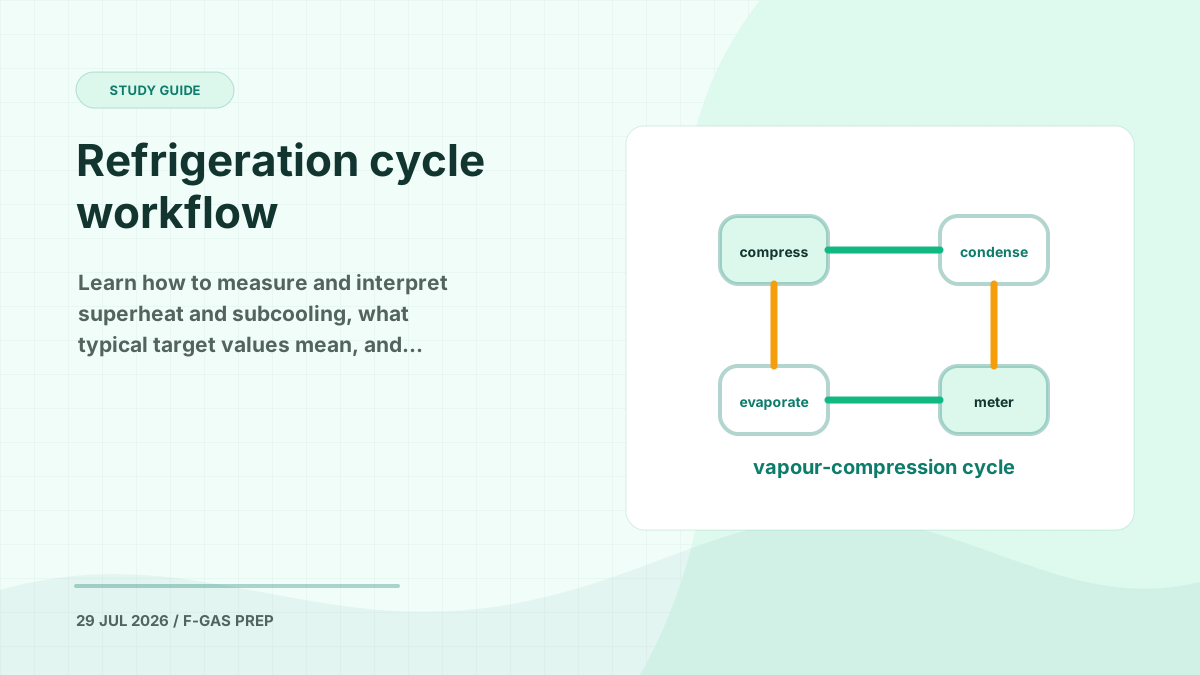
Ask any experienced refrigeration engineer which two numbers tell them most about a system, and you will almost always get the same answer: superheat and subcooling. They take minutes to measure, they need no special equipment beyond gauges and a decent temperature probe, and between them they tell you whether the charge is right, whether the metering device is working, and whether the compressor is at risk.
For anyone preparing for City & Guilds 2079, these two measurements sit right at the heart of the practical assessment and the theory paper alike. Get comfortable with them and a large chunk of the syllabus starts to make sense.
What superheat actually tells you
Superheat is the temperature of a vapour refrigerant above its boiling point at a given pressure. As the video puts it:
“It tells us how much heat the refrigerant has absorbed after it has completely boiled into a vapour in the evaporator.”
That last phrase is the important one. Once the refrigerant has fully boiled, any further heat it absorbs raises its temperature rather than changing its state — and that temperature rise above saturation is superheat.
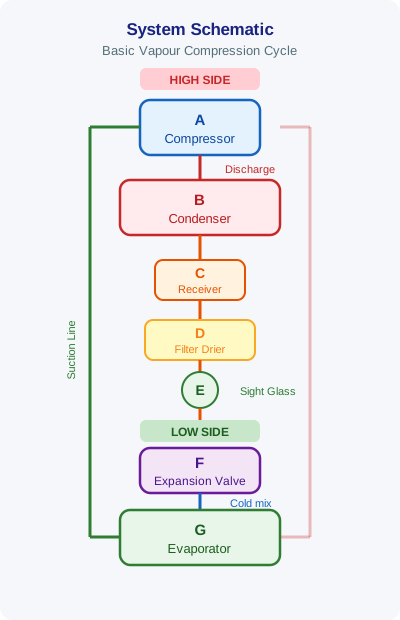
We measure it at the suction line, just before the refrigerant enters the compressor. The reason is entirely practical: it confirms that only vapour, not liquid, is arriving at the compressor. Liquid refrigerant is incompressible, so a slug of it reaching the cylinders means valve damage, broken reeds, or in bad cases a wrecked compressor.
The calculation is straightforward:
- Read the suction pressure at the service port.
- Convert that pressure to the saturation temperature for the refrigerant in use, via a pressure-temperature chart or your gauge’s built-in table.
- Measure the actual suction line temperature with a clamp-on or surface probe.
- Subtract the saturation temperature from the line temperature.
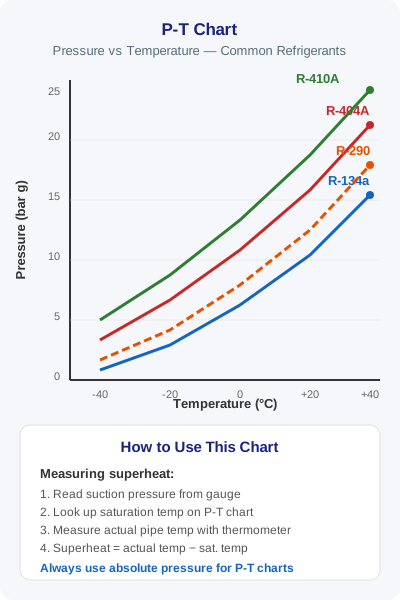
Using the worked example from the video: if the boiling point at the measured pressure is 40°F (4.4°C) and the actual line temperature is 55°F (12.8°C), the superheat is 15°F (8.3°C).
What subcooling actually tells you
Subcooling is the mirror image. It is the temperature of a liquid refrigerant below its condensing point at a given pressure — how far the refrigerant has been cooled after it has fully condensed into a liquid in the condenser.
We measure it at the liquid line, just before the metering device. Again the reason is practical: proper subcooling ensures that only liquid, not flash gas, is entering the thermostatic expansion valve or capillary tube. A TEV is sized to meter liquid. Feed it a mixture of liquid and vapour and it will starve the evaporator, because vapour occupies far more volume for the same mass.
Following the video’s example: if the saturation temperature at the measured high-side pressure is 100°F (37.8°C) and the liquid line temperature is 90°F (32.2°C), the subcooling is 10°F (5.6°C).
Exam tip: Candidates frequently mix up which side of the system each measurement belongs to. Remember the sequence of the cycle: the evaporator makes vapour, so superheat is a vapour measurement on the low side; the condenser makes liquid, so subcooling is a liquid measurement on the high side.
Side-by-side comparison
| Superheat | Subcooling | |
|---|---|---|
| Refrigerant state | Vapour | Liquid |
| Pressure side | Low side | High side |
| Measured after | Evaporator | Condenser |
| Measuring point | Suction line, before compressor | Liquid line, before metering device |
| Protects | The compressor | The metering device |
| Compared against | Evaporating saturation temperature | Condensing saturation temperature |
Both readings, taken together, tell you whether the system is charged properly. Neither one on its own is conclusive — which is exactly why an engineer takes both before reaching for a cylinder.
Diagnosing faults from the readings
This is where the two numbers earn their keep. The video summarises the interpretation neatly:
“Too low superheat could mean liquid is getting to the compressor. Bad news.”
Here is how to read each condition:
- Superheat too low — liquid refrigerant is likely reaching the compressor. Causes include an overcharge, a TEV that is overfeeding or has a failed sensing bulb, or a bulb that has come loose from the suction line. Act on this quickly; floodback destroys compressors.
- Superheat too high — the system is undercharged, or the evaporator is not receiving enough refrigerant. As the video explains, this indicates the refrigerant vaporised too early in the coil, reducing cooling capacity and efficiency. Look also at a blocked filter drier, a restricted or underfeeding TEV, or poor evaporator airflow.
- Subcooling too low — undercharge, or flashing in the liquid line. A restriction upstream of the measuring point, or a long vertical liquid lift without adequate subcooling, can both cause it.
- Subcooling too high — an overcharge, or a restriction in the condenser side that is backing liquid up in the coil. A partly blocked condenser or a fouled coil will do the same by raising head pressure.
Notice the pattern: an undercharge tends to raise superheat and lower subcooling, while an overcharge tends to do the reverse. When both readings point in the same diagnostic direction, you can be confident. When they conflict, suspect a restriction or a metering-device fault rather than a charge problem.
Typical target values
The figures quoted in the video are a sound starting point for most direct expansion systems:
- Superheat: 10 to 20°F (5.6 to 11.1°C), depending on system type and load.
- Subcooling: 8 to 15°F (4.4 to 8.3°C) is common on most systems.
But the video’s closing caution is the part to memorise:
“But always refer to the manufacturer’s specs.”
Targets vary enormously between system types. A flooded evaporator, a low-temperature pack, a heat pump running in heating mode, and a small split unit with a capillary tube will all want different figures. Electronic expansion valves in modern equipment often run tighter superheat than a mechanical TEV would tolerate. Treat the generic ranges as a sanity check, and the data plate or commissioning sheet as the specification.
Why this matters under F-Gas Regulation 517/2014
It might seem as though superheat and subcooling are purely a performance topic, but they connect directly to your legal obligations under EU Regulation 517/2014 and the retained GB F-Gas Regulation.
- Article 3 requires operators to take all precautions to prevent unintentional release of fluorinated greenhouse gases, and requires that equipment is repaired without undue delay once a leak is detected. Diagnosing a low charge by measurement — rather than simply topping up — is how you distinguish an undercharge caused by a leak from a restriction that mimics one. Topping up a leaking system is precisely the practice the Regulation is written to stop.
- Article 4 sets the leak checking regime by CO₂ equivalent charge (5, 50 and 500 tonnes CO₂e thresholds, with the intervals halved where no leak detection system is fitted). Understanding what a genuine charge loss looks like on the gauges helps you decide whether a system needs an immediate check.
- Article 8 requires recovery of refrigerant by certified personnel during servicing and decommissioning. Correct interpretation of subcooling prevents the wasteful practice of venting and recharging to “reset” a system that in fact has a mechanical fault.
- Article 10 and Annex I underpin the certification requirement itself: only certified personnel may carry out installation, servicing, maintenance, repair and decommissioning of stationary refrigeration, air conditioning and heat pump equipment containing F-gases. The competence being certified includes exactly this kind of diagnostic reasoning.
Key point: Every unnecessary connection of gauges to a system risks a small emission at the service port. Taking accurate readings first, and knowing what they mean, reduces how often you need to break into the circuit at all.
Where this appears in City & Guilds 2079
Superheat and subcooling cut across several of the 2079 skill groups rather than sitting in just one:
- Thermodynamics and the refrigeration cycle — the underlying theory of saturation, latent heat and sensible heat, and reading the cycle on a pressure-enthalpy diagram.
- System components — evaporators, condensers, expansion devices and how each one behaves when starved or flooded.
- Installation and commissioning — setting charge to specification and recording commissioning data.
- Leak checking and system inspection — recognising the symptoms of charge loss and distinguishing them from mechanical faults.
- Fault finding and system performance — the diagnostic reasoning described above.
In Category I assessment in particular, you can expect both written questions on the definitions and calculations, and practical tasks that require you to connect gauges, take temperature readings and state whether the system is operating correctly. Examiners look for the correct measuring point, not just the correct arithmetic — pointing your probe at the wrong section of pipe invalidates the whole reading.
How F-Gas Exam Prep fits into this
Superheat and subcooling are a good example of a topic where knowing the definition is not the same as being able to answer an exam question about it. The real questions ask you to interpret a set of readings, pick the measuring point, or identify which fault produces a given combination of high superheat and low subcooling.
The F-Gas Exam Prep app is built for exactly that kind of practice:
- 370+ exam questions spanning every skill group, including thermodynamics, system components, commissioning and fault diagnosis.
- Mock exams that mirror the real City & Guilds 2079 format, so you sit the paper under realistic conditions before the day itself.
- AI voice challenges that quiz you out loud — useful for drilling saturation temperatures and diagnostic rules while you are driving between jobs.
- Detailed explanations for every answer, so when you misread a superheat scenario you find out precisely why the correct option was correct.
Two small measurements, as the video says, that make a huge difference to system performance — and to your exam result. Learn to take them properly, learn what each combination is telling you, and a large part of both the theory paper and the practical assessment will look considerably less intimidating.
Start Practising Today
Download the F-Gas Exam Prep app and study with 460+ practice questions, mock exams, and detailed explanations.